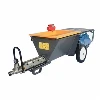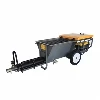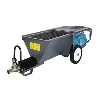
Mark the wall surface (center point 1.6m from the ground, bottom point 400px from the ground, one point every 1.5m), do this one day in advance.
Water the wall (brick wall). Do this one day in advance.
Measure the room height and add appropriate connectors. (The machine's upright is designed for a 2.85m room height; if the room is higher, add corresponding connectors.)
Install the upright. (Two people install, ensuring the threaded connections are flat.)
Install the handles. (Handles are for left and right.)
Connect the power supply. If the power indicator light stays on, the three-phase power is correct. If the light flashes briefly and then goes out, the power input is reversed.
Press the up button to raise the machine's upright to 1-50px from the ceiling.
Tighten the hydraulic system and pull up the handles.
Positioning (one person holds the center bar, the other holds the support and presses the hydraulic system).
Press the hydraulic system; the upright rises and presses firmly against the ceiling, securing the machine.
Add ash, press the start button, and the machine will rise.
After the machine reaches the top, it will vibrate for 5-7 seconds. Turn off the power, then turn it back on. The machine will descend and smooth the wall surface.
Once the machine reaches the bottom, release the hydraulic pressure.
Press the lowering button (lower by 50px), and the upright will lower.
Move the machine (make sure the ash slab is flush against the wall and move the machine horizontally) so that there is a 50px gap between the two wall panels.
Reposition the machine and work on the second wall panel.
Clean the machine promptly after each use. Disconnect the power before cleaning.
Rinse the ash hopper and vibrator area directly with a water hose. Do not wash the machine panel with water; only wipe it with a cloth.